The Custom Made Sugar Glider Enclosure
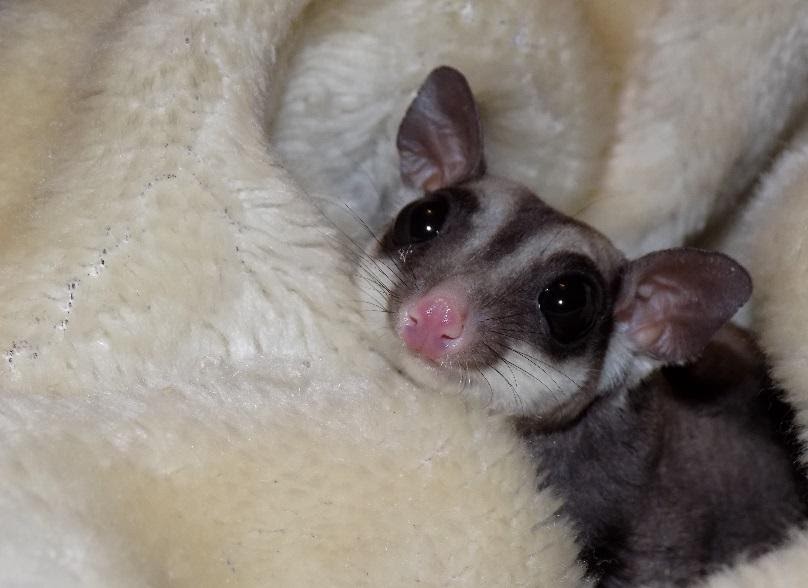
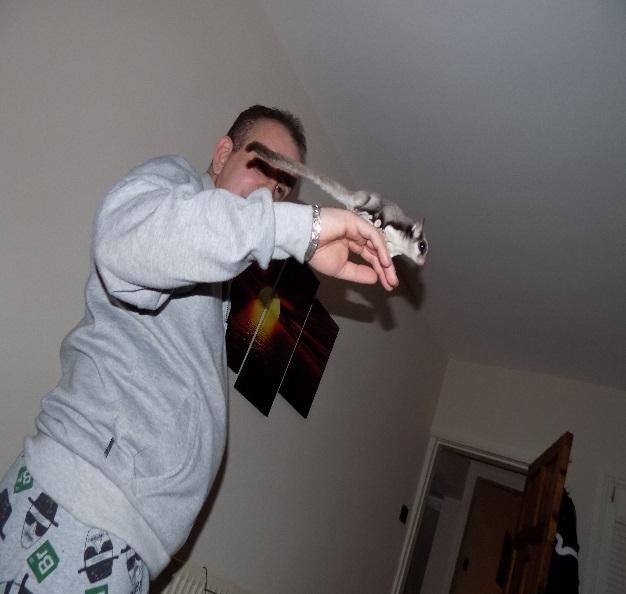
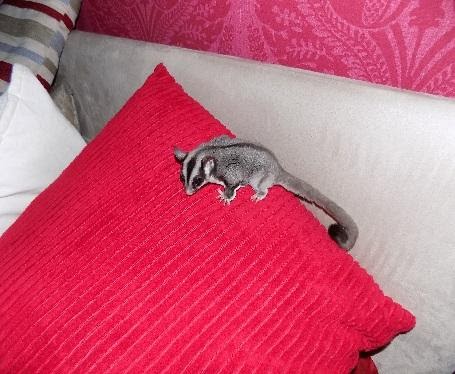
I have kept sugar gliders for almost a year and gradually increased my small colony from two to four gliders. The sugar glider (Petaurus breviceps) is a small, omnivorous arboreal, and nocturnal gliding possum belonging to the marsupial infraclass. The common name refers to its preference for sugary nectarous foods and ability to glide through the air. The scientific name, Petaurus breviceps, translates from Latin as “short-headed rope-dancer”, a reference to their canopy acrobatics.
Update: “The shelves are definitely taking some hammering at the moment but they are washing down great and so easy to dry off, defo be recommending the lacquer to others”
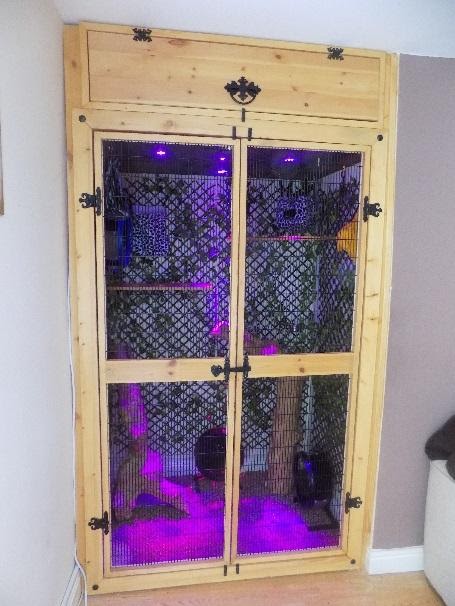
I have two neutered males and two females that were housed in two adapted bird aviaries but felt a better designed cage/vivarium was needed to enrich their social and very active lifestyle. After looking for a larger cage/custom made vivarium for my four gliders I decided that the cost of having a large and aesthetically pleasing cage was too excessive. This, coupled with the fact I had a large and relatively unused recess in my living room, I decided to build my own enclosure. I am in no way skilled with joinery or electrical work and although I did have the help with part of the frame the majority of work I undertook myself.
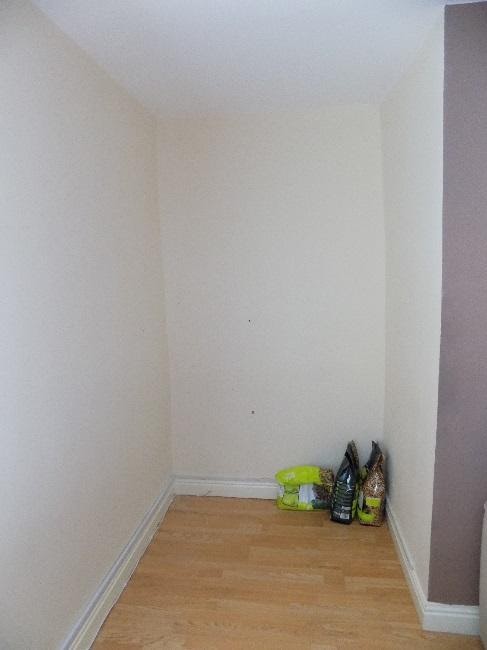
Size of recess 7.5 x 4.5 x 3.25 foot
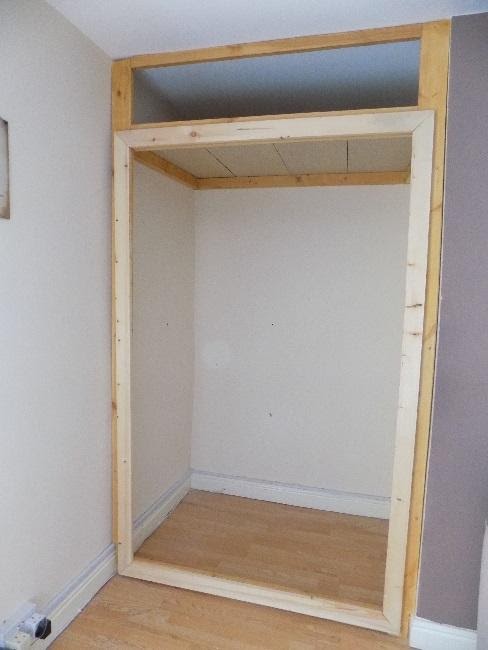
Initially two 2.75 x 1.75inch pieces of timber were screwed to the walls and to those I attached the inner frame pieces consisting of 3.75 x 0.75inch pieces of pine wood.
Pine in its natural form is toxic to gliders but they would have to ingest large amounts for it to be dangerous. Gliders are not notorious chewers like rodents (gliders are not related in any way to rodents) but to minimise any possible dangers, all wood used in this enclosure (including shelving) has been given various coats of
AURO wood stain (160) and natural lacquer (261).
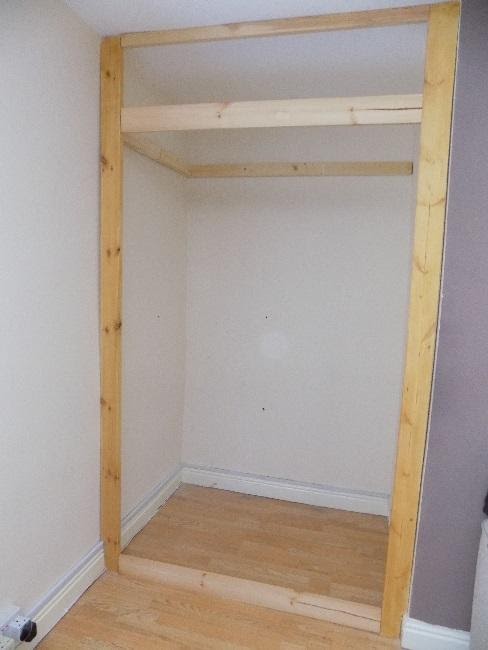
These are natural non-toxic water based products and the lacquer carries the EU DIN 71 accreditation for toy safety. Top and bottom cross pieces of the treated pine wood were attached to complete the inner frame and further pieces of timber were installed to hold the false ceiling.
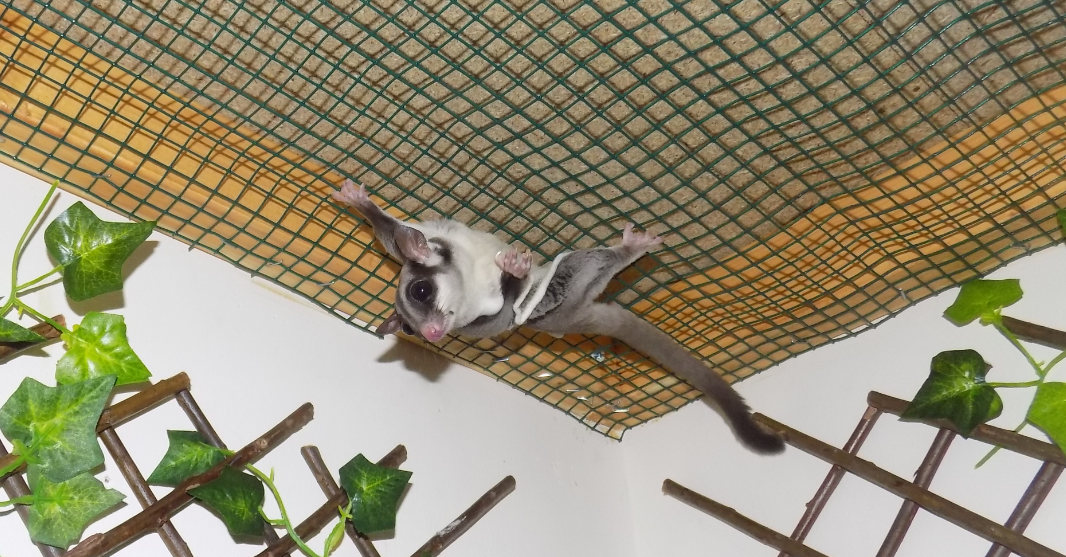
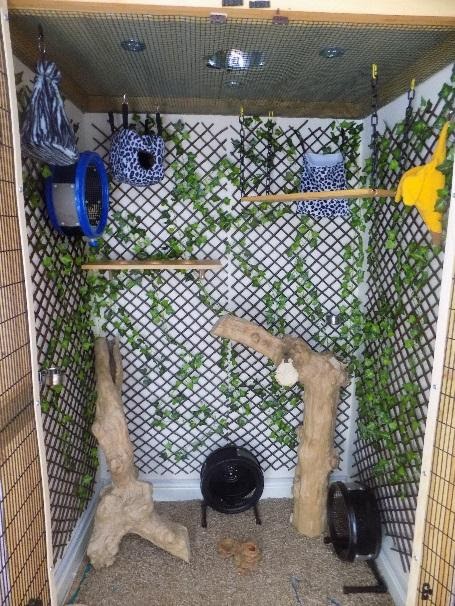
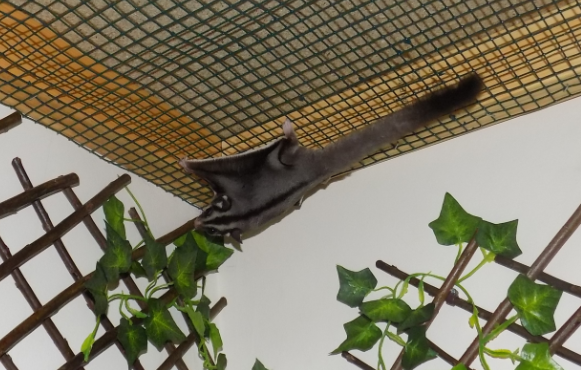
The false ceiling was installed to house the lights and heat lamp and a panel of plastic coated mesh was put underneath this to stop my gliders coming into direct contact with the lights/lamp. Added bonuses with the mesh panel are that it allows me to hang items direct from the ceiling and items can be moved around thus changing the internal setup.
Two outer frames, again made of pine (treated), were placed over the inner frame to give the doors more stability and rigidity for the overall enclosure. Finally the doors where hung and I opted for custom made powder coated mesh as opposed to perspex/toughened glass due to the solid walls and ventilation issues. The top door was made from tongue and groove to cover the false ceiling which houses the lights and heat lamp and this will also be used for storage.
As I already have laminated flooring I used a 3mm piece of plastic sheet to cover the bottom of the enclosure. This is covered with wood pellet cat litter and the plastic can be removed easily when cleaning the enclosure.
The inside of the enclosure was given a couple of coats
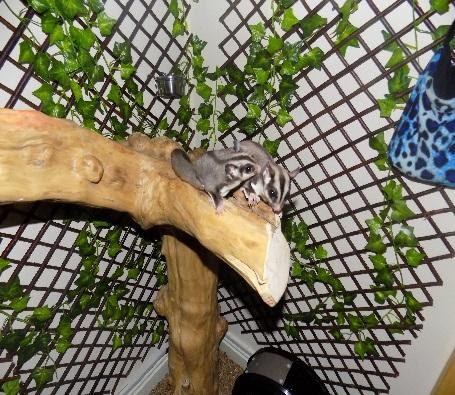
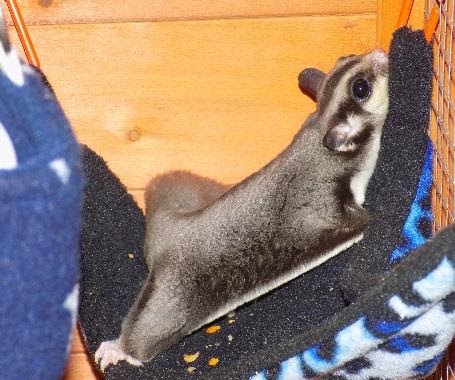
Auro 328 natural emulsion and willow trellising hung to give a more natural and easy accessible environment for my gliders. Artificial ivy and a couple of pieces of java wood have been used as they create a more natural feel to the enclosure. The java pieces are covered in crevices, groves and holes making them ideal enrichment tools stuffed with treats and elements of the gliders staple diet. The java wood also gives somewhere for my gliders to play, hide, perch, etc. and, as these are free standing, can be moved around the enclosure.
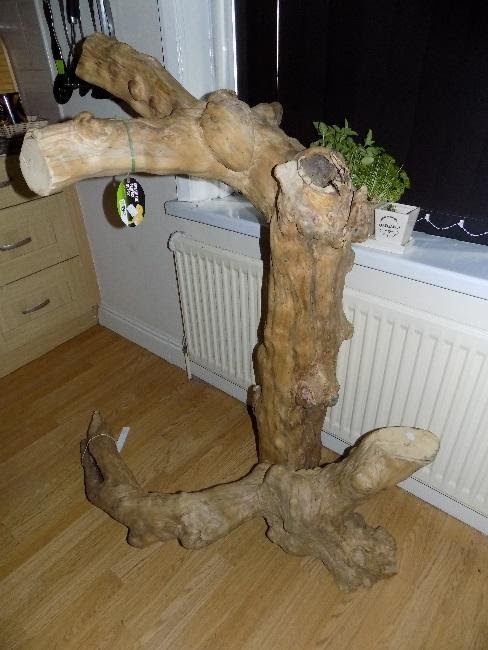
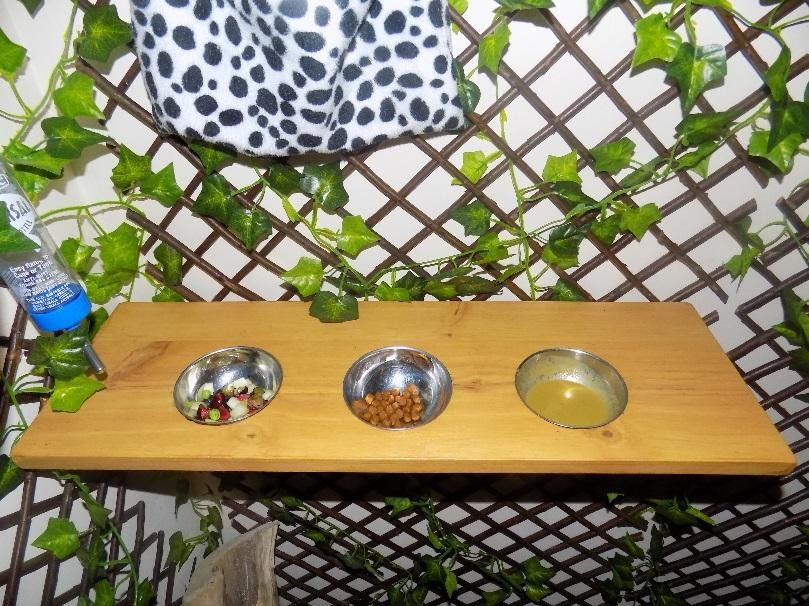
Basic pine shelves measuring 60 x 20cm were used in the enclosure with a hole cut in the middle. The shelves had all their edges sanded to get rid of the sharp points and they were treated in the same way as the other wood. The reason for the hole is that it gives somewhere for my gliders to explore and, like the feeding station, a stainless steel bowl can sit in the hole offering treats during the night and dried food during the day. Treats/food will not be put in the bowls every day and they will be varied between shelves/rock feeders encouraging my gliders to forage.
The feeding station is another basic shelf which has three holes cut into it for food bowls. The station is big enough to accommodate all four of my gliders but if a dispute arises I can simply place some more food on the other hanging shelf. I have placed three small water dishes and two water bottles around the enclosure so that my colony always has access to fresh water. The feeding station was mounted with steel brackets that are covered in plastic ensuring that there are no sharp points that can harm my gliders.
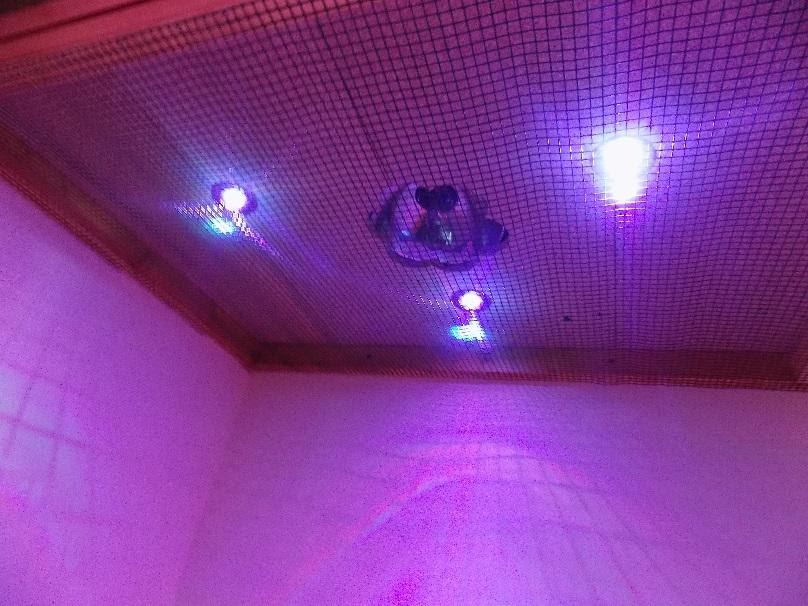
Two fire rated/IP65 spotlights have been fitted in the suspended ceiling mainly for my benefit. The spotlights were wired to an individual loop circuit with the correct lighting wire and plugged into an extension cable located in the false ceiling. As gliders are nocturnal they have no real need for artificial light but with me being an avid glider fan I want to study them so this requires light. I fitted colour changing LED GU10 bulbs and the colours vary from white to all the colours of the rainbow. I will not be holding a glider disco so a lot of the colours will not be used but the most important colour is red which is the closet replica of nocturnal lighting. The bulbs have a dimmer facility so this can be adjusted to suit.
A poultry heat lamp has also been installed in the false ceiling and this has a 150 watt infra-red bulb which will be used when the temperature in the enclosure falls below 22 degrees. These lamps omit a constant temperature but do dry the air out which can cause problems with gliders fur. To combat this a humidifier will be placed outside the door to run in conjunction with the heat lamp.
Pouches, hanging towers and stealth wheels were placed in the interior and cast iron brackets, handles and decorative pieces were fitted to the exterior to complete the enclosure. The overall cost of the enclosure amounted to just under £525 which is less than a quarter of what I got quoted for a custom made cage of the same size. In my opinion the enclosure gives far better housing for my gliders than any cage/vivarium ever could and, if maintained properly, will last for many years to come.

This content was kindly written entirely by a customer, all opinions and product choices are entirely by the customer and we cannot be held responsible for any of this content, or what you do with this information. Always ask for advice if you have any queries about our range of products. Standard terms and conditions apply.
Hi! I’m Chris, the founder of The Organic & Natural Paint Co, and I’m focused on the education and promotion of natural non toxic alternatives to chemical laden everyday products that we just take for granted. We have a choice, and I want to raise awareness of alternative products that don’t actually harm us!
This company is my way of pushing the awareness of better indoor air quality, something that I am personally passionate about due to my own children’s breathing medical conditions. I just couldn’t paint with big brand standard petrochemical paint any longer and wanted another solution.
Read more: About me
Twitter: NaturalPaintCo
Instagram: thenaturalpaintco